
‹ Unlocking the Power of Atlas
Unlocking the Power of Atlas (1): A Guide to Importing and Indexing Codebases
Import a codebase into Eclipse and index it into the annotated graph Atlas analyzes.
Atlas starts its analysis journey by importing and indexing your codebase in Eclipse to create an annotated graph representation. This guide will walk you through these essential steps.
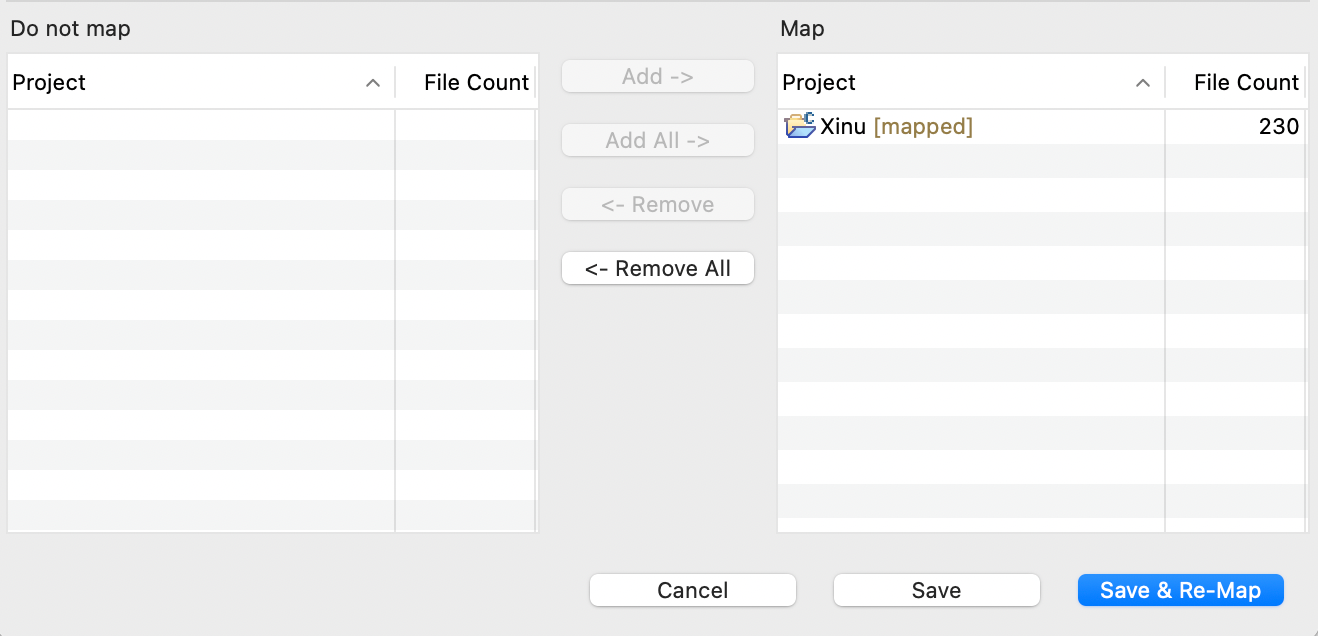
You will be able to index a codebase by mapping it as shown by the end of this guide
Step 1: Importing Your Codebase into Eclipse
To analyze your codebase with Atlas, the first step is importing it into Atlas as an Eclipse project.
Importing an existing project
If you already have your codebase as an Eclipse project, then you simply need to import it into your workspace.
Start the Import Wizard: Open Eclipse and navigate to File → Import.
In the wizard, choose Existing Projects into Workspace under the General category.
Browse and Import: Click Select archive file, locate your project, either as an archive or a dirrectory, and click Finish.
Your project will now appear in Eclipse’s Package Explorer.
Creating an Eclipse project from a C codebase
No Eclipse project for your codebase? No problem! There is a built-in wizard specifically for C code.
- Open Eclipse and go to File → Import.
- In the wizard, choose Existing Code as Makefile Project under the C/C++ category.
- Browse to your project directory, assign a name, and complete the process by clicking Finish.
Step 2: Indexing Your Project with Atlas
Once the codebase is imported, it’s time to harness the power of Atlas. Indexing transforms the project into a graph database, which serves as the foundation for Atlas’s advanced analysis capabilities.
Indexing Steps
- Open Atlas Menu: Hover to the top of the screen and select Manage Project Settings.
- Prepare the Project: Remove any existing projects, then add the new project (e.g., “Xinu”).
- Index the Project: Click Save & Re-Map. Atlas will generate the graph database, with progress displayed in real-time.
When the indexing reaches 100%, your project is ready for analysis.
Why Use Atlas?
Atlas’s graph-based representation unlocks unparalleled insights into your codebase. Key features include:
- Smart Views and Shells: Visualize relationships and dependencies within your code.
- Graph Traversal APIs: Navigate through the codebase graph efficiently.
- Advanced Graph Operations: Execute complex queries and analyses with ease.
From debugging to identifying optimization opportunities, Atlas transforms the way developers understand and interact with software.
Atlas, with its Eclipse integration, bridges the gap between raw code and actionable insights. By following our “Unlocking the Power of Atlas” series, you’ll be ready to dive into your projects with confidence, leveraging the full power of graph-based software analysis.