
Introduction
SimDiff 4 is the leading diff and merge solution for team development of Simulink models.
SimDiff's merge is the easiest and most reliable way to integrate changes from different team members into a single Simulink model. It provides two modes of operation, merge and comparison mode. It comes in three editions: Standard, Professional and Team. The table below lists the differences among the editions.
| SimDiff Team | SimDiff Professional | SimDiff Standard | |
|---|---|---|---|
| Diff |  |
|
|
| Report | |
|
|
| Merge | |
We highly encourage you watch the SimDiff demo. After that you can use this manual as a quick reference while using SimDiff. Its small width makes it fit perfectly next to SimDiff on your monitor.
Requesting Support from EnSoft
If you have any questions you can send an e-mail to support@ensoftcorp.com. If you have a general question about SimDiff please include it in the body of your email.
If you experience an error while running SimDiff please include your SimDiff log.
You can open the log by selecting
Start ▷All Programs ▷EnSoft ▷SimDiff 4 ▷SimDiff Log,
save it to a location of your choice and attach it to your email.
Terminology
Throughout this manual and the SimDiff user interface the following terms for models are used:
- Left Model: usually, the model that you modified or local copy.
- Right Model: usually, the model someone else modified or copy in the repository.
- Base Model: the most recent common ancestor of the left and right models. Used for three-way comparison or merge.
- Output Model: the model that will result from the merge. When the output model is not specified, merges are performed in the left model.
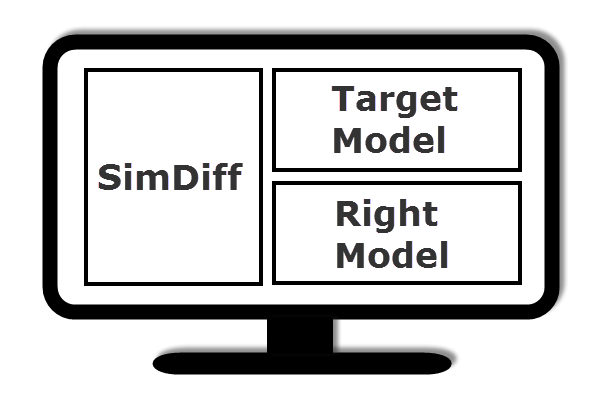
- Target Model: we use this name for convenience to refer to the model where merges will be done, that is, either the left or output model.
Installation
Run the SimDiff installer from the e-mail you received from EnSoft, or your SimDiff Installation CD, and follow the onscreen instructions.
The first time you run SimDiff you will be asked to enter your license key or license server information. You should have received instructions on how to get your license key by email. If you didn't please email us at sales@ensoftcorp.com
SimDiff 4 works out-of-the-box with most version control systems. For details, please refer to the section Repository Integration.
Configuring MATLAB/Simulink Installations
The first time SimDiff requires MATLAB it will ask you to configure MATLAB/Simulink installations on your computer. You can rerun the auto-detection process, or add and remove installations manually, through the preferences:
▷File ▷Preferences.
Note: Due to compatibility issues, SimDiff 4 is not able to connect to MATLAB R14SP1 and older on Windows Vista or newer.
Changing Window Positions
SimDiff will make optimal use of your display by organizing SimDiff and Simulink windows. You can change the default positions in the preferences:
▷File ▷Preferences.
If you have configured SimDiff 4 to run from a repository client then you can skip this section and go to the next section titled Using SimDiff.
You can start SimDiff directly from the "SimDiff 4" start menu option.
Model selection window
Once SimDiff starts, the model selection screen will appear prompting you to enter the files you wish to compare or merge. Follow the steps below.
1. Select a Mode
Comparison: when you simply want to compare two models without merging changes. This mode disables the merge buttons in SimDiff so you cannot accidentally modify your models.
Merge: this mode allows you to merge changes from one model to another.
2. Select Models to Compare/Merge
Depending on the mode you choose there are up to four different models that SimDiff will use:
Left Model: the model that you modified or local copy.
Right Model: the model someone else modified or copy in the repository.
Base Model: The most recent common ancestor of the left and right models. This is optional and it's only used for three-way comparison or merge.
Output Model: When in "Merge" mode, you can optionally specify a fourth optional output model. Otherwise, merge results will be saved to the left model.
When in "Comparison" mode, you have the option to compare library links. For details refer to the section Breaking Library Links.
3. Begin Comparison or Merge
After choosing a mode and specifying your models click on the Start button.
3-way vs 2-way Comparison and Merge
A 3-way comparison is more exact than a 2-way comparison because it tells the user how models were changed, not just how they differ. As a consequence, 3-way merging is more reliable than 2-way merging. The only difference is that 3-way comparison makes use of a common ancestor. Let’s look at a simple example.
| Original Model |
|---|
| A |
| B |
Suppose that the model above was modified by two users resulting in the two models below.
| Model 1 | Model 2 |
|---|---|
| A | A |
| B | |
| C | |
| D |
| ⇐Same |
| ⇐Different |
| ⇐Different |
| ⇐Different |
A 2-way comparison of the models can just tell whenever two elements are same or different. Without examining the original model there is no way of knowing if D was added to Model 1 or if D was deleted from Model 2. SimDiff's 2-way comparison approach always assumes the change occurred in the right model. Therefore, in the above example it will report D as deleted. During the merging stage, it is the user responsibility to decide whether D should be deleted or kept in the merged model. Note that in all 2-way merge tools the resulting merged model will be determined by user decisions during the merging process.
In contrast a 3-way comparison will examine the original model (the common ancestor) along with the two models to be compared to tell us how the models were changed.
| Model 1 | Model 2 |
|---|---|
| A | A |
| B | |
| C | |
| D |
| ⇐Same |
| ⇐Deleted |
| ⇐Added |
| ⇐Added |
With this information it is straightforward to produce the merged model below.
| Merged Model |
|---|
| A |
| C |
| D |
Using SimDiff from MATLAB
To use SimDiff from MATLAB, you will need to first add the SimDiff installation directory to the MATLAB path:
- 1 Open MATLAB.
- 2 Click on File ▷ Set Path...
- 3 Click on Add Folder and add the SimDiff installation directory to the MATLAB path.
- 4 Click Save, then click Close.
You can now start SimDiff or use the SimDiff API from MATLAB. Type help simdiff4 or doc simdiff4 in MATLAB for a full list of options.
SimDiff shows your model on the left and the model in the repository on the right. The changes made to both models are also indicated. You can double click any element in the model and SimDiff will show it in a Simulink window.
SimDiff provides a getting started guide that shows how to use its basic features. It also includes a set of sample models that are used in several sections of the guide. You can access the guide, compare the sample models with just one click or open the sample models folder from ▷Start ▷All Programs ▷EnSoft ▷SimDiff 4 ▷Getting Started.
Toolbar Buttons
 Synchronize Synchronize |
 Locate Stateflow object currently selected in Stateflow Editor Locate Stateflow object currently selected in Stateflow Editor |
 Generate change report (**) Generate change report (**) |
 Open Model Open Model |
 Previous Change Previous Change |
 Show element in Simulink window Show element in Simulink window |
 Next Change Next Change |
 Merge Change (*) Merge Change (*) |
 Previous Conflict Previous Conflict |
 Hierarchy merge - merge selected elements and descendants, excluding conflicts and Stateflow (*) (***) Hierarchy merge - merge selected elements and descendants, excluding conflicts and Stateflow (*) (***) |
 Next Conflict Next Conflict |
 Undo Last Merge Action (*) Undo Last Merge Action (*) |
 Locate block currently selected in Simulink Window Locate block currently selected in Simulink Window |
 Redo Last Merge Action (*) Redo Last Merge Action (*) |
* Team edition only
** Team and Professional editions only
*** Excludes conflicting merge actions. Also excludes Stateflow merge actions because they may alter layout, and in turn execution behavior. Thus, the user must merge and check them one at a time.
Info Panel
The Info Panel gives a plain language description of the currently selected element. It's very handy if you are new to SimDiff 4.
Visualizing attribute changes
You can visualize attribute changes for the selected element in the Attributes panel that is located in the bottom tab group. The panel provides a toolbar with toggle buttons to show/hide the base value, the filtered attributes and the unchanged attributes.
You can see a more detailed view of an attribute's value change by clicking the ellipsis button for the corresponding attribute. For most attributes, it will show both values color-highlighted to indicate the changes. For attributes that store the values of a Truth Table, it will show a color-highlighted custom renderer that mimics the format of the truth table as shown by Stateflow. Finally, for attributes corresponding to Simulink mask parameters, it will show a color-highlighted table describing all mask parameters and its changes.
Merging
- Single Merge: you can merge a difference by clicking one of the merge action buttons between the two model hierachies—it's that simple!
- Multiple Merge: if you want to merge multiple changes at once, select them in the model hierarchy and then click the merge toolbar button.
- Hierarchy Merge:
You can also merge all changes under a given element with just one click. Just select the container element and click the hierarchy merge toolbar button.
This will merge the selected element and its descendants, excluding conflicts and Stateflow.
Conflicts are excluded because they require user decision. Stateflow changes are excluded because extra care is needed after each Stateflow merge. Refer to section Stateflow Support for details.
Tip: Hierarchy Merge runs faster when Simulink Highlighting is disabled. For details refer to section Highlighting Changes in Simulink.
If you want to merge a change manually you can edit your model directly in its Simulink window and then click the synchronize button in SimDiff. Note however, that this merge will not be tracked by the SimDiff undo system.
SimDiff will automatically make backup copies of your models when you start merging. By default backup copies are stored in:
"...\My Documents\SimDiff 4\model-backup" for 7 days. You can change this in the preferences:
File ▷Preferences.
Merge Actions
Merge actions are indicated by a colored arrow in between the two model trees.
 When an element has been added in the right model, you can click on this merge action to add the same block in the target model.
 When an element has been deleted from the right model, you can click this merge action to delete the same block in the target model.
 When an element's attributes have been changed in the right model you can click this merge action to copy these attribute changes to the target model.
Conflicts and Dependencies
If the same element was changed in both the left and right models, this is called a conflict. It means that if the change in the right is applied it may overwrite some of your changes in the left model. Note that a change in both, left and right, can only be determined when the base model is available. Therefore, conflicts can only be detected in 3-way comparison or merge mode.
The merge action for a conflict is shown with the  red merge icon.
Some changes depend on other changes. For example, in order to add a signal the blocks it connects must be present. SimDiff knows about dependencies and will automatically apply dependent changes when a merge action is executed.
If a change depends on a conflicting change, its merge action is shown with the
 orange icon.
Clicking it will apply all dependent merge actions; this may overwrite some of your changes in the left model.
orange icon.
Clicking it will apply all dependent merge actions; this may overwrite some of your changes in the left model.
If a change depends on a merge action that cannot be executed it will be blocked.
Blocked merge actions are shown with the  overlay icon.
You can attempt to apply this change by modifying the model directly in its Simulink window. When you are done, click the synchronize button.
overlay icon.
You can attempt to apply this change by modifying the model directly in its Simulink window. When you are done, click the synchronize button.
You can view dependent merge actions by using the Dependencies tab. The dependencies are organized in a tree, where the children have to be executed before the parents.
Important: After editing the model directly in Simulink you need to let SimDiff know that some changes have occurred. You can do this by clicking the synchronize button.
Merge Actions and Filtering
If an element difference is filtered, the merge action for that element will normally be hidden. The exception is when the merge action is a dependency for an unfiltered merge action. In that case, a hollow merge action icon ![[filtered merge action arrow]](images/mc_filtered.png) is shown. This merge action cannot be directly merged, but is merged if the dependent merge action is merged.
is shown. This merge action cannot be directly merged, but is merged if the dependent merge action is merged.
Viewing Changes in Simulink/Stateflow
Elements can be viewed in its Simulink/Stateflow window by double clicking them in the two tree view or by selecting them in the two tree view and pressing the window toolbar button.
Highlighting Changes in Simulink
When viewing differences in Simulink/Stateflow, Simulink changes can be highlighted based on the kind of change. This setting can be enabled/disabled from the View ▷Highlight Changes in Simulink menu option. Note that its effect is observable only when models are open.
When Simulink highlighting is enabled, elements will be colored using the default coloring scheme as shown in the table below.
| Simulink Highlighting Colors | |
|---|---|
 |
Element added |
 |
Element deleted |
 |
Element or descendant has a change |
 |
Element or descendant has a conflicting change |
Colors for added, deleted or changed elements can be customized from File ▷Preferences.
This method of highlighting masks block color settings, but does not alter them, and the highlighting is not saved in the model file.
SimDiff applies highlighting to both blocks and lines. Note that with branched lines, the entire branch must be highlighted, so highlighting for branched lines may sometimes be inaccurate.
Auditing Changes
SimDiff includes some useful features for reviewing and auditing changes. Users can leave notes on changes, mark changes as reviewed, and apply tags to changes. SimDiff also keeps track of the username and date of the last review.
Auditing data can be saved to and loaded from a file, and can also be included in the Change Report. See section Generating a Change Report.
The auditing feature adds a number of new user interface components:
- The Auditing Panel, located in the bottom tab group, can be used to edit auditing data for the currently selected item(s). Here, the user can toggle a checkbox to mark or unmark changes as reviewed, add or modify tags to associate with the changes, and leave or edit a note on the changes.
- The Review column, located to the right of the right model column in the main two-tree view, shows the reviewed status for each row in the view. Items that are reviewed with be marked with an icon (
 ), while items that are not reviewed will not have the icon. Users can click to toggle the reviewed status for that row.
 - The status bar at the bottom of the main window now shows the Review Progress – the total number of reviewed changes compared to the total number of changes.
- The Preferences dialog now includes a tab for Auditing Preferences. These preferences can also be conveniently accessed from a button on the Auditing Panel.
Auditing tags are markers that can be added to changes to categorize them. Tags have a name, a color, and a description. The name can be used to identify the tag, and can include alphanumeric characters, dashes, underscores, and periods. The color also helps identify the tag, and can be any of the predefined Simulink colors. The description is a short sentence that provides more information about the significance of a tag.
Tags can be quickly applied or even created from the Auditing Panel by simply typing a new tag name in the Tags field. Multiple tags in the Tags fields are separated by a comma. The Tags field also includes a drop-down box for applying or removing existing tags. The full auditing tag list can be viewed and edited from the Auditing Preferences.
Users can provide more information about a difference using auditing notes. In the Auditing Panel, users can type a new note, or select a previously used note from the drop-down.
Audit data can be saved and loaded from the Auditing Menu. This allows data from the current session to be saved and then reloaded at a later time. It also enables the auditing process to be divided among team members, since the auditing data file can be transferred from one person to another.
SimDiff also provides ways to edit audit data in bulk. The main toolbar includes buttons to mark or unmark the selected change as reviewed. If multiple items are selected, the button will mark or unmark all selected changes. Each toolbar button also includes a drop-down arrow in the bottom-right corner that will also mark or unmark all children of the selected change(s). Finally, when multiple items are selected, the Auditing Panel will display and allow editing of audit information for all of the selected items.
Generating a Change Report
A change report lists all the changes found in the compared models. You can save a change report in either XML or HTML format. The MATLAB API also allows you to return the change report as a MATLAB variable.
Changes are split in four main categories: model property changes, configuration parameter changes, system changes and Stateflow machine changes.
System changes are organized by container elements. For each container element the following information is included:
- The path to the container element
- Optional screenshot of the container element (HTML only)
- List of additions and/or deletions in the left model
- List of additions and/or deletions in the right model
- List of elements that are in both models and had attribute changes
To generate a change report go to the File ▷Generate Change Report... menu option or click the  window toolbar button. A dialog will pop up in which you can select the report file location as well as several options for the report generation.
Exporting Highlighted Models
To export copies of your models with the differences highlighted, click the File ▷Export Highlighted Models... menu option. If you have merged any changes, you will be prompted to synchronize. Then a dialog will open asking you where to save the models. The exported model names will match those of the original models, but with "_highlighted" appended to the model name.
For Simulink blocks and annotations, the background color indicates the kind of change. The same coloring scheme as for highlighting changes in Simulink is used. For details refer to the section Highlighting Changes in Simulink.
For Stateflow objects, a prefix added to the label indicates the kind of change. The following prefixes are used: "c_" for a changed object, "a_" for additions, "d_" for deletions and "co_" for conflicts. Prefixes are used since Stateflow currently does not support adding colors to objects.
There is a special case where another prefix format is used. When output state activity is enabled for a State, Stateflow automatically creates an associated Data object. In R2012b and earlier, the Data name always matches the State name. In this case, SimDiff uses a special prefix in the State to indicate changes in both State and Data objects, using the following format: <data-prefix>D_<state-prefix>_<state-name>.
For example, if someone deleted the associated Data for a changed State named 'State1' the new prefixed name will be 'dD_c_State1'.
Filtering Changes
SimDiff provides a powerful filtering feature that allows you to easily focus on the changes you are interested in. It allows you to specify the elements you are interested in (e.g. Constant blocks) or the elements you want to exclude in the comparison. Similarly, you can specify which attribute changes you want to see or not see. You could even specify to only include changes on attributes for a given set of elements.
Filters are split in two types, Element and Attribute filters, which in turn can be in Include or Exclude mode.
Element filters allow specifying which element type(s) will be included/excluded in the comparison. Possible values for element types are:
- Block.[BlockType] where [BlockType] is any possible value for the BlockType attribute in the model file. Some possible values are: Constant, Gain, SubSystem, etc. The "Block." prefix could be avoided but it's recommended to include it to prevent any possible future ambiguity.
- Line, Annotation, ConfigurationParameter to include/exclude changes on lines, annotations and any change in configuration parameters respectively.
- Stateflow.[ObjectType] where [ObjectType] could be any of the following Stateflow objects: Chart, EMChart, TruthTableChart, AtomicSubchart, State, Box, Annotation, Function, EMFunction, SLFunction, TruthTable, ConnectiveJunction, HistoryJunction, Transition, Data, Event, Target, and Machine.
Attribute filters allow specifying which attribute(s) will be included/excluded in the comparison. Possible values for attributes are:
- Attribute name as it appears in the model file or SimDiff's Attributes tab.
- Dotted notation for compound attributes (e.g. TargetLink.output.type, Port.Name). Compound attributes are visualized in a hierarchy within the Attributes tab.
Wildcards are allowed when specifying attributes names. An asterisk (*) matches any sequence of characters and a question mark (?) matches a single character. For example, you could type Port* to filter all attributes starting with the word "Port".
By default, an attribute filter applies to all element types. However, it is possible to configure an attribute filter so it applies to specific element types.
Filter Mode - SimDiff offers two modes of filtering for changes on elements and attributes.
- Exclude Filters - ignore changes for specified elements or attributes.
- Include Filters - show changes for specified elements or attributes, and ignore everything else
If multiple exclude filters are enabled, the effect is to exclude the union of the exclude filters. If multiple include filters are enabled, the effect is to include the union of include filters, then exclude any remaining exclude filters. Element and attribute filters are independent. For example, if lines are included, and the Color attribute is excluded, then SimDiff will only show changes for lines, and will show all attribute changes in lines except the Color attribute.
Here is a complete description of the process SimDiff uses to apply attribute and element filters. First, SimDiff groups filters by type (attribute or element). For each group:
- 1 Combine all inclusion filters into a single inclusion mega-filter by taking the union of specified attributes/elements
- 2 Combine all exclusion filters into a single exclusion mega-filter by taking the union of specified attributes/elements
- 3 If the inclusion mega-filter is not empty, mark as filtered all attributes/elements not specified by the inclusion mega-filter
- 4 Mark as filtered all attributes/elements specified by the exclusion mega-filter
- 5 SimDiff ignores changes for all attributes/elements that are marked as filtered out
To edit filters go to Edit ▷Filters... menu option or click the  button. It is possible to exclude changes you want to ignore after the comparison was done. To do this, you can right-click on the elements or attributes you want to ignore and add them to a desired exclude filter. Results will be updated immediately.
A set of built-in filters is included with the SimDiff distribution. The list of attributes or element types in built-in filters cannot be modified. They can still be enabled or disabled as any other filter.
Filtered elements will appear in the SimDiff's model hierarchies with the overlying icon. Filtered attributes will appear in the attributes tab with the
  icon.
icon.
Note that merging is not affected by attribute filters. Thus, when an element with attribute changes is merged all its attributes will be merged regardless of whether they are filtered or not. Attributes related to layout are the only exception to this rule. They are only merged when they are not filtered.
Comparing Subsystems
Besides model files, SimDiff 4 can also compare and merge subsystems inside of model files. After selecting a model file, the user can choose a subsystem inside a model file to use when comparing or merging models.
Comparing subsystems allows the user to focus on a portion of the model. Not only can this help the user focus by reducing the background noise from changes in other parts of the model, it also can shave even more time off of SimDiff's fast comparison times.
This feature can also be used to compare separate subsystems against each other. This can be useful in cases where blocks were refactored (i.e. moved from one subsystem to another, or grouped together under a new subsystem or new model). In fact, a subsystem can even be compared to an entire model.
Note: special care should be taken when merging inports/outports in the subsystem, since removing a port may disconnect a line in the parent system.
Comparing Workspace Variables
SimDiff can optionally compare the workspace variables from the MATLAB Base Workspace and the Model Workspace.
To compare workspace variables follow these steps:
- 1 Open SimDiff
- 2 Select the “Compare workspace” check box that is located below the model selection fields.
- 3 If you need to set up the workspace, click the “Configure…” button. This will open a dialog that allows you to run commands and scripts to set up the workspace appropriately for each model. The MATLAB path can be either set by typing MATLAB commands or selecting an existing script.
- 4 Begin the comparison. When SimDiff compares the models, it will also compare the workspace variables in both the MATLAB Base Workspace and the Model Workspace.
Details about differences on each variable are displayed in the GUI. The viewer is similar to the MATLAB Workspace window. Double-clicking a struct or matrix cell opens another tab to display its contents.
Breaking Library Links
Your models may contain library links, that is, reference blocks to library blocks. By default SimDiff will only compare the information inside the model file—in this case the reference block, not the library block. However, SimDiff offers the possibility to break library links so that all referenced library blocks are compared.
To break links follow these steps:
- 1 Open SimDiff
- 2 Select Comparison mode. Note that breaking links is only allowed in Comparison mode.
- 3 Select the “Break Library Links” check box that is located below the model selection fields.
- 4 If you need to specify library dependencies, click the “Configure…” button. This will open a dialog that allows setting the MATLAB path appropriately for each model so that library dependencies are found. The MATLAB path can be either set by typing MATLAB commands or selecting an existing script. Once the setup is done, it can be saved as a Preset for convenience.
- 5 Begin the comparison. SimDiff will create temporary copies of the models with links broken and will compare them.
Undoing Merge Actions
SimDiff allows undoing/redoing merge actions for Simulink elements. There are some limitations and guidelines to follow for a proper use of this lab feature. For instance, undoing merge actions for Stateflow elements is not supported yet. In order for the undo feature to work properly these are the situations that should be avoided:
- 1 Closing MATLAB: manually closing the MATLAB session SimDiff is connected to could cause loss of undo data. As a consequence, future undo operations could fail. Thus, if the MATLAB session is closed, it's recommended to click the synchronize button and then continue with the merge process.
- 2 Closing target model without saving: if the model has unsaved changes and it is closed without saving, then future undo operations could fail. Thus, if the target model has to be closed without saving, it's recommended to click the synchronize button right after closing it.
- 3 Changing target model: changes manually done in the target model could interfere with undo operations. Thus, you should synchronize after modifying the model.
Note that even if an undo operation fails due to some of the above or other situation, SimDiff still allows you to go to the next undo operation.
Important: note that the undo/redo history is cleared when synchronization is done.
Comparing models saved with different MATLAB versions
SimDiff allows to compare models that were saved with different MATLAB versions. This is only possible in comparison mode. In merge mode, SimDiff requires to upconvert models to the closest common higher MATLAB version that is available on the system. Upconversion creates a temporary copy of the model and the upconverted model is saved in that temporary copy. In the case that the left model was upconverted and no output model was specified, then the left model will be overwritten with the upconverted version once merging is done.
Temporary Model Copies
There are certain situations in which SimDiff will create temporary copies of the models to perform the comparison and merge. These situations are:
- When model file names are not valid for MATLAB. This could occur when file names are renamed by repository systems.
- When links were broken on models. For details refer to the section Breaking Library Links.
- When model up-conversion was required. For details refer to the section Comparing models saved with different MATLAB versions.
When a temporary copy of a model has been created, SimDiff will include the  button next to the model path in the GUI.
Clicking this button will open the file manager and will select the corresponding temporary model.
button next to the model path in the GUI.
Clicking this button will open the file manager and will select the corresponding temporary model.
Note: when in merge mode, any merges done into a temporary target model will be propagated to the original target model when synchronizing or at SimDiff exit.
SimDiff also supports the merging of Stateflow elements. Since the position of Stateflow elements can have an effect on behavior, extra care must be taken when merging Stateflow. You can use merge actions just as with Simulink, and then adjust positions if necessary.
Using SimDiff in Batch Mode
If you have a workgroup floating license, you can call SimDiff's batch mode executable, sd4.exe. Note that merging models requires interaction from the user, so merge is not supported in batch mode.
You may want to add the SimDiff installation directory to the Windows path for convenience.
sd4.exe has the following return values:
- -1: the models are different
- 0: the models are the same
- <any other value>: there was an error
For more information on the batch mode API, open a command prompt and run sd4 -h.
Passing Arguments to SimDiff
You can pass command line arguments when invoking SimDiff. This can be done by creating a shortcut to "C:\Program Files\EnSoft\SimDiff 4\simdiff4.exe" or just invoking simdiff4.exe from the command line.
To get help about passing arguments to SimDiff GUI, go to Help ▷ Command Line Options or open a command line prompt and type simdiff4.exe -h.
SimDiff Exit Codes
SimDiff will return the following exit codes for both the command line and the desktop application:
| Code | Description |
|---|---|
| 0 | Success - no differences found |
| 1 | Success - differences found |
| 100 | Failure - general |
| 101 | Failure - license validation |
| 102 | Failure - invalid program input |
| 103 | Failure - invalid program configuration |
Note - these codes are provisional and may change in future releases
SimDiff 4 works best when integrated with your repository system client. Most repository systems provide a way to compare and merge different versions of a file stored in the repository. This is almost always a "client side" operation. Typically, the client application for the repository runs a built-in or pre-packaged tool, providing the tool with command-line arguments that point to a temporary checkout of the revisions to be compared.
However, many repository systems can be configured to use an external tool of the user’s choice. Some repository systems even can be configured to use different tools based on a pattern match, such as file extension. These are the easiest systems to configure with SimDiff, although any system that allows for user configuration of diff and merge tools can be made to work.
EnSoft has detailed documentation for integrating SimDiff with many repository system clients on our website. Please note that the website list is not exhaustive - even if your system is not listed, it may still be possible to configure it. Below are some generic instructions for integrating SimDiff with almost any repository system client.
If you are having trouble integrating your repository system client with SimDiff, please contact support at support@ensoftcorp.com and we will be happy to help.
Basic Instructions for Integrating with a Repository Client
For most clients, you will be asked to configure two commands to execute – one for comparing, and one for merging.
For comparing, use this command:
"C:\Program Files\EnSoft\SimDiff 4\simdiff4.exe"
-baseModel <baseModel> -leftModel <leftModel> -rightModel <rightModel>
For merging, use this command:
"C:\Program Files\EnSoft\SimDiff 4\simdiff4.exe"
-merge -baseModel <baseModel> -leftModel <leftModel> -rightModel <rightModel> [-outputModel <outputModel>]
(please use the path to your specific SimDiff 4 installation)
Replace <baseModel>, <leftModel>, and <rightModel> with the appropriate syntax for your client. Some repository clients require a separate output file; to do this add a fourth parameter to specify the output file.
If your repository client adds an invalid character to the model name that would prevent Simulink from opening it, SimDiff will automatically remove it.
Your client configuration might not provide a pattern matching mechanism so that SimDiff can be configured to operate only on model files. This is a problem if your repository also holds non-model files. To work around this, you can use the ToolSelector utility program, which ships with SimDiff and is located at C:\Program Files\EnSoft\SimDiff 4\utils (or wherever SimDiff 4 is installed). Please refer to the ToolSelector documentation in the utils directory for information on how to set up ToolSelector.
Legal Notice
SimDiff 4 User Manual
Copyright (c) 2004-2024 EnSoft Corp. All Rights Under the copyright laws, this manual may not be copied, reproduced, or redistributed, in whole or part, without the written consent of EnSoft. Your rights to the software are governed by the accompanying end user license agreement. Every effort has been made to ensure that the information in this manual is accurate. EnSoft is not responsible for printing or clerical errors.
EnSoft Corp.
2625 North Loop Drive Suite 2580
Ames, IA 50010 USA
Phone: +1-515-296-3253
Email: contactus@ensoftcorp.com
All other company and product names mentioned in this document are trademarks of their respective companies. Mention of third-party products is for informational purposes only and constitutes neither an endorsement nor a recommendation. EnSoft assumes no responsibility with regard to the performance or use of these products.